DIY Suspension Trainer
I have always felt the need to be doing more than just running for keeping fit. Yeah, the dreaded core work. I stink at keeping to a regular routine.
Some of my problem, at least the excuse I lean most heavily on, is that I have a disc issue in my lower back that is easily aggravated when doing the traditional crunches and other core moves. I have looked at doing things like Crossfit, but have never really gotten any traction there.
When I first saw suspension training, the lightbulb finally went on. Here was something that looked like I could handle doing without ticking off the trouble spot in my back. It looked fun and challenging. Then Lucho started posting a bit regarding some of his TRX workouts. I was sold. This had to be the tool I had been searching for.
A few mouse clicks later, and I hit my first roadblock. $250 for the system I wanted.
Seemed a little steep for some webbing and handles (oh, plus all the workout DVDs). Still, I could easily justify that amount if it was something that I would consistently use and would work for my needs. I just didn’t want to spend that much up front to find out.
The gears started turning and I figured I could make something myself fairly easily to try out.
There are dozens of examples on YouTube for doing that very thing:
Some of them looked okay, and I even had the straps they used sitting in my garage. The buckles are huge and heavy, though. I didn’t like the idea of them banging around into each other and/or me while I was trying to work out. In the first video you can hear the buckles and hooks clanking around while he’s just standing there holding it all in his hands.
I wanted something that was adjustable, but I didn’t want to rely on buckles to accomplish that. Keep it simple, light, strong, and clean.
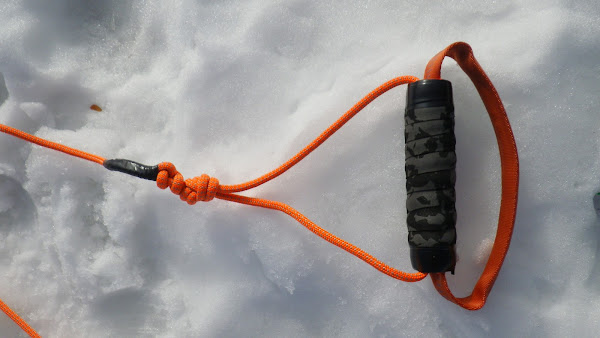
I opted to use the pvc handles, but with one piece of rope running through the entire setup. I went with 7mm static cord because it was easier to work with for the types of knots I used and made a cleaner design than webbing could have. Since there weren’t any buckles in the design, webbing wasn’t needed.
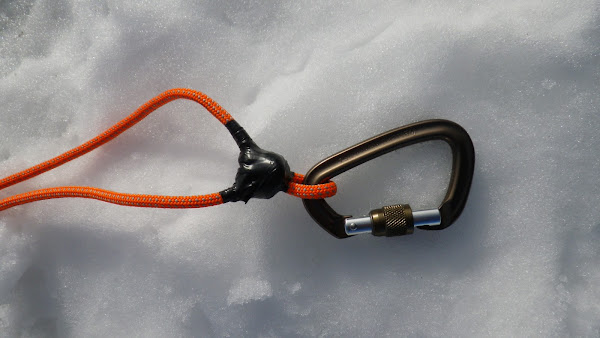
I used Figure 8 knots for the handle loops which are much more secure than the bowline used in the video. The bowline is a good knot, but can work loose when it is unloaded. I backed the knots up with a couple of hitches and taped the ends. This design also has the advantage of allowing the handle loops to be clipped directly, in case you wanted to set up something for doing pullups with independent attachments.

I then used an Alpine Butterfly knot in the center of the cord to be used for clipping with a carabiner. That knot is a perfect one for making a small loop in the center of a line.
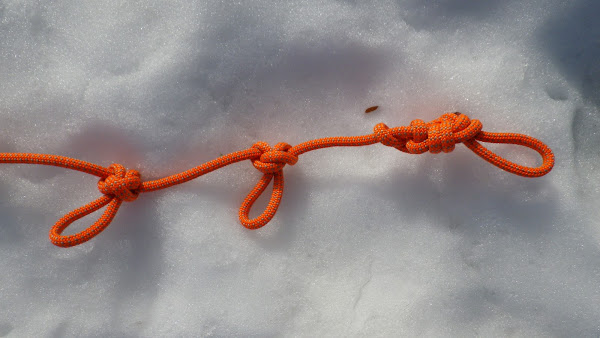
You need to be able to quickly adjust the suspension trainer to different lengths to allow for various movements (like the Scorpion, or an Atomic Pushup). The crux of my design is to use a daisy chain type of arrangement to accomplish this. After trying many different variations with webbing and rope, I settled on using a length of rope with Figure 8 loops on each end and Alpine Butterfly knots at regular intervals in-between. This allows for a great range of adjustment and is as simple as clipping a ‘biner to whatever loop you want to get the desired length.
Very simple.
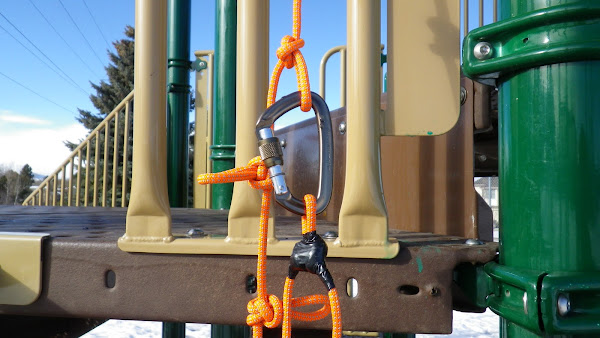
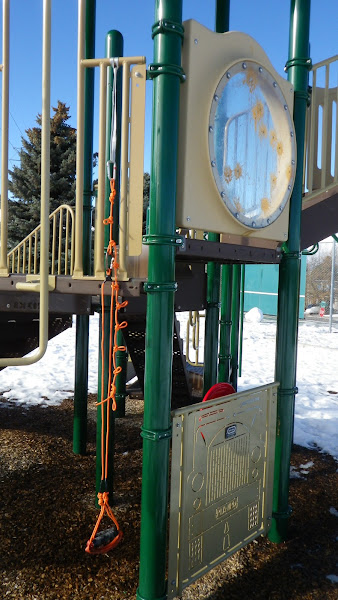
I’m probably most proud of the design I came up with for the foot loops. Again, simple and clean was the goal. I used tubular nylon webbing and inserted a thin piece of hose I cut up to help it hold the ‘U’ shape. Then I threaded the webbing through the handles leaving plenty of length on each end. I tied a simple overhand knot in each end and then pulled the webbing back inside the handles forcing the knots into each other to hold it all in place. Then trim the excess. Nice and tidy.

I tested out a handful of different prototypes and liked this one the best. It’s everything I was hoping to achieve when I started the project. The biggest challenge by far was getting all of the knots centered and evenly distributed.
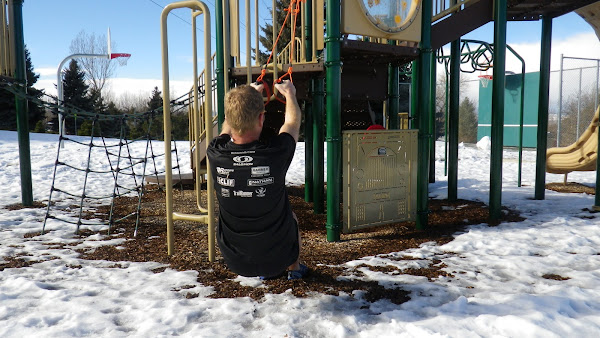
I toss it into a cinch sack and take it along on the shorter mileage days to mix things up a little.

The total cost was around $20. The carabiner was the most expensive item.
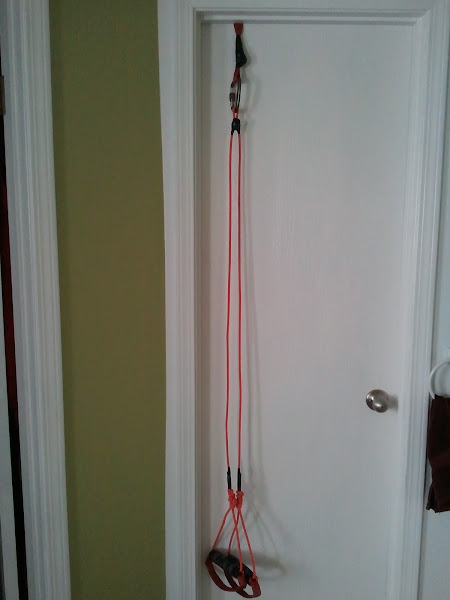
I even created a door hanging option using some webbing with a double stopper knot. Works great!
Now I just need to build some strength up to where I can actually make good use of the thing.
Posted on January 4, 2012, in stuff, training. Bookmark the permalink. 3 Comments.


That’s awesome. Time to go get a patent!
Do you have a material list (rope length, pipe length, etc.)? Thanks for the write-up!
+1 for the material list! I want too!